Tag: Rebonding

  • Rebonding vs Heat Iron: Which Straightening Option Is Best?

    Rebonding vs Heat Iron: Which Straightening Option Is Best?

    Short answer: pick Rebonding (chemical straightening) if you want straight hair that lasts 3-6 months, and pick a heat iron for daily styling or if you have fine or damaged hair. Rebonding changes the hair’s internal structure with chemicals, while a heat iron only temporarily changes hydrogen bonds.

    Who Is Rebonding For?

    Naturally curly, thick or hard-to-manage hair, and anyone who wants long-lasting straight hair (3-6 months). Avoid it if there are cuts or inflammation on the scalp.

    Rebonding Steps and Timings

    1. Hair assessment: make sure the hair is not coloured or badly damaged. Avoid if the scalp has cuts or inflammation.
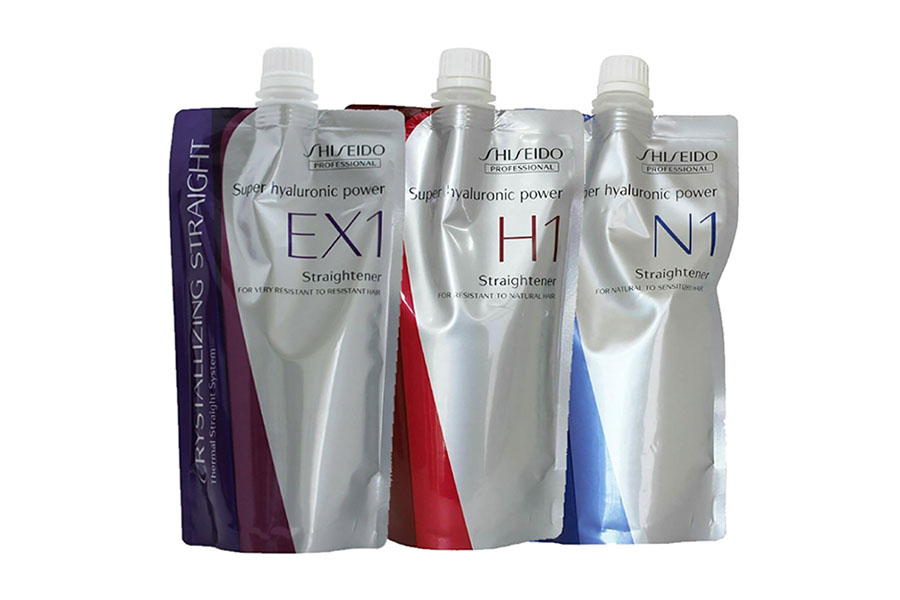
    2. Apply the softener (H1): apply 1-2 cm away from the roots down to the ends. Waiting time: 10-25 minutes, depending on hair type.
    3. Elasticity test: pull a strand — if it springs back to 1.5x its original length, it is soft enough.
    4. Rinse and dry: rinse clean, dry, then use a 180°C flat iron to set the shape.
    5. Apply the neutraliser (H2): apply over the whole head, leave for 20-30 minutes, then rinse clean.

    The Science Behind Rebonding

    • H1: alkaline agents (e.g. sodium hydroxide) break the disulfide (S-S) bonds.
    • H2: oxidising agents (e.g. hydrogen peroxide) re-form the disulfide bonds.

    Rebonding Precautions

    ⚠️ Avoid contact with the scalp — risk of chemical burns.
    ⚠️ Use a keratin mask after the treatment to help the hair recover.

    Who Is a Heat Iron For?

    Daily styling, or fine and damaged hair where you want to avoid chemicals.

    Heat Iron: Temperatures and Technique

    1. Preparation: dry hair to 80%, then spray a heat protectant (contains silicone).
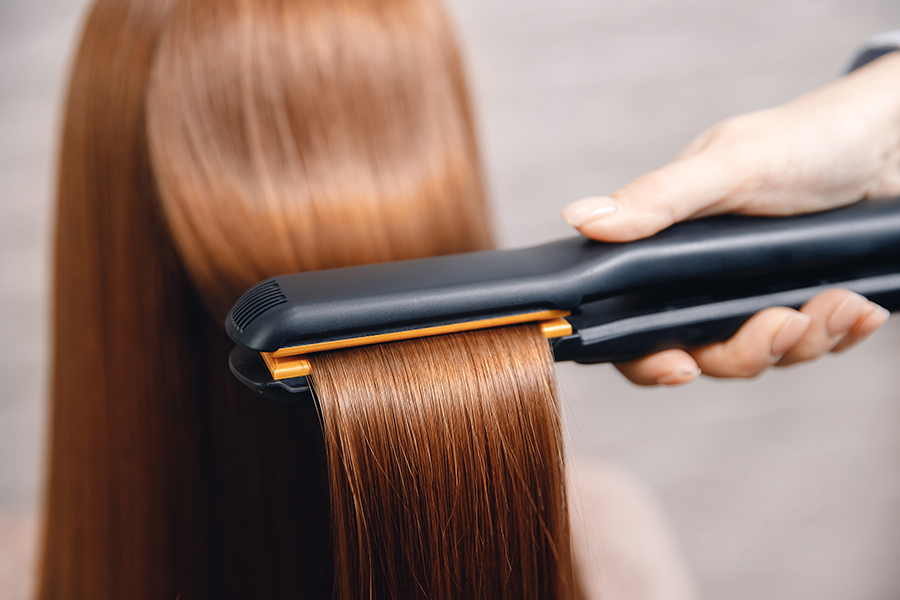
    2. Section and set the temperature: fine hair 120-160°C; normal hair 160-180°C; thick hair 180-200°C.
    3. Straightening technique: glide slowly from 2 cm away from the roots to the ends. Do not go over the same strand more than twice.
    4. Cooling: finish with cool air to help close the cuticle.

    Heat Iron: Science and Precautions

    Heat temporarily changes hydrogen bonds; above 200°C it damages keratin. ⚠️ Never use it on wet hair — it can create “air bubbles” inside the hair. ⚠️ Clean the iron with alcohol regularly.

    Rebonding vs Heat Iron: At a Glance

    AspectRebondingHeat Iron
    Result3-6 months (permanent)1 day (temporary)
    DamageHigh (chemical)Moderate (controlled heat)
    Suitable forHealthy, thick hairAll hair types
    DifficultyNeeds a professionalCan be done at home

    Aftercare

    1. Sulfate-free shampoo: keeps the scalp pH at 4.5-5.5.
    2. Weekly hair mask: choose one with hydrolysed keratin or panthenol.
    3. Avoid excess heat: cut down on dryers and flat irons.

    Summary

    For thick, healthy hair that wants one long-lasting result, choose Rebonding — but keep up the aftercare. For daily styling with lower risk, use a heat iron and control the temperature and frequency. Rebonding must be done by a certified stylist. To ask about products or salon supplies, WhatsApp us or visit our product pages.
  • Rebonding vs Flat Iron: Which Straightening Fits You?

    Rebonding vs Flat Iron: Which Straightening Fits You?

    Rebonding and flat iron both give you straight hair, but the mechanism is completely different: rebonding uses chemicals to change the hair structure from inside and lasts 3-6 months, while a flat iron only uses heat and the effect disappears the next time you wash your hair. The right choice depends on your hair condition, how long you want the result to last, and how much damage risk you are willing to accept.

    Rebonding: 3-6 months of straight hair, but the highest risk

    Rebonding is a chemical process that alters the internal structure of the hair so curly hair becomes permanently straight. The result lasts, but the risk is also the highest.

    Who is it suitable for?

    • Natural curls, coarse and hard hair, or resistant hair
    • People who want a one-time treatment that stays straight for 3-6 months
    • Precondition: the hair must be healthy, not bleached or coloured, and the scalp must have no wounds

    The professional process

    1. Assess the hair: confirm there is no bleaching, no severe damage, and no wound on the scalp.
    2. Apply the softener (H1): keep 1-2cm away from the roots and apply evenly. Wait 10-25 minutes and check every 5 minutes (the stretch test should rebound about 1.5 times for the best result).
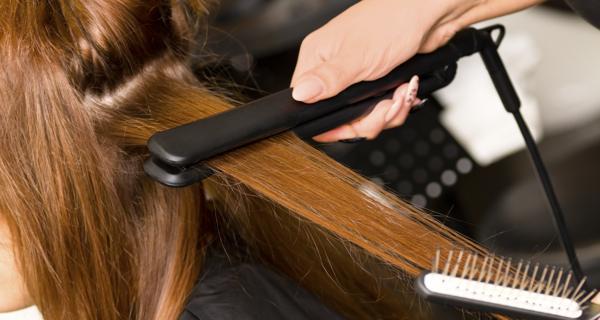
    3. Rinse and set with a flat iron: rinse thoroughly, blow dry, then straighten small sections with a flat iron at 180°C.
    4. Apply the neutralizer (H2): apply over the whole head, leave for 20-30 minutes, then rinse thoroughly to stop the chemical reaction.

    Why it works

    • Softener: breaks the disulfide bonds (S-S) inside the hair so the strands become soft and mouldable.
    • Neutralizer: rebuilds those S-S bonds and locks the straight shape in place.

    ⚠️ Risks you must know

    • Chemical burns: the softener contains strong alkaline ingredients; contact with the scalp can cause redness and burns.
    • Hair breakage: if the hair is already damaged, the chemicals will damage its structure further.
    • Irreversible: once the hair is over-softened it cannot be repaired, only cut off.

    My advice: rebonding is never a home DIY project. If you decide to do it, go to a professional stylist, and start a weekly keratin mask right after to replace the protein the chemicals took out.

    Flat iron: temporary straightening you fully control

    This is the everyday method: wash, blow dry, then straighten section by section with a flat iron. The effect only lasts until your next wash, but you stay in full control.

    When it fits

    • Quick styling before going out
    • Fine, soft hair and already damaged hair — the group that should not touch chemicals again

    The correct steps

    1. Protect first: after washing, blow dry until almost dry, then spray heat protectant evenly.
    2. Section the hair and set the temperature:
      • Fine hair: 120-160°C
      • Normal hair: 160-180°C
      • Coarse hair: 180-200°C (never exceed 200°C)
    3. Straightening technique: start 2cm away from the root and pull down slowly and evenly. Do not pass over the same section more than 2 times, and keep each pass to 3-5 seconds.
    4. Cool and set: right after straightening, blow cool air over the hair to help the cuticles close.

    How heat straightens hair

    High heat temporarily breaks the hydrogen bonds in the hair, so the hair goes straight. When it meets water (washing), the hydrogen bonds return and the hair goes back to its original shape. Damage comes from temperatures above 200°C, which destroy keratin and cause dryness and split ends that cannot be reversed.

    ⚠️ Safety tips

    • Never flat iron wet hair: the water inside the hair turns to steam instantly, forming bubbles inside the strand — this is bubble hair, and the hair breaks from inside.
    • Clean the flat iron: leftover styling product reduces heat transfer, so wipe it with an alcohol swab once a week.

    Quick comparison: rebonding vs flat iron

    • Durability: rebonding 3-6 months (permanent); flat iron less than a day — it is gone once you wash your hair.
    • Type of damage: rebonding chemical damage (high risk); flat iron heat damage (controllable).
    • Hair type: rebonding suits healthy uncoloured hair and coarse hair; a flat iron suits all hair types as long as the temperature is adjusted.
    • Who can do it: rebonding must be done by a professional; a flat iron you can do yourself.
    • Upfront cost: rebonding needs a higher one-time investment; a flat iron only needs the tool plus heat protection products.

    After-care decides the final result

    1. Change your shampoo: use Ionic Nutritive Shampoo and Ionic Nutritive Conditioner (pH 4.5-5.5) to help the cuticles close.
    2. Deep treatment weekly: once a week, use a deep hair mask (with hydrolyzed keratin or panthenol).
    3. Trim split ends: split ends cannot be repaired; if you do not cut them, they travel further up.
    4. Wash less often: 2-3 times a week is enough, because washing too often makes the straight effect fade faster.

    Summary

    If your hair is healthy and you want to forget about curls for 3-6 months, rebonding is the fit — but have a professional stylist do it and never skip the after-care. If your hair is already damaged, or you only want straight hair once in a while, a flat iron with a heat protectant is the safer route. Whichever you pick, one principle stands: hair health comes before styling. Still unsure which suits your hair type? Send us a photo of your hair on WhatsApp for a free assessment, or view our product page.

  • Hair Damaged After Rebonding? LB-II Ionic Crystal Repair Serum

    Hair Damaged After Rebonding? LB-II Ionic Crystal Repair Serum

    Dry, rough, split ends after a client’s bleaching, rebonding or perming session are the biggest headache for salon owners and stylists, but handled well they are a golden chance to lift retail profit. The key is using a professional product that gives an instant “wow” effect in front of the mirror — LB-II Professional Ionic Crystal Repair Serum.

    Why ordinary hair oil cannot rescue rebonded or bleached hair

    Ordinary hair oils sold outside only coat the surface of the hair for temporary shine. On hair badly damaged by chemicals, the cuticle is already open and protein has been lost. What you need is an ionic formula to close the cuticle, not a sticky oil.

    The salon’s secret weapon: LB-II Professional Ionic Crystal Repair Serum

    To convince a client to buy before they walk out of the salon, use the LB-II Ionic Crystal Repair Serum. Nicknamed the “invisible plaster” for hair, it is formulated for extremely damaged, breakage-prone and split ends. It comes in a 140ml size.

    3 main selling points for stylists to close the sale

    • Instant visual effect (tackle frizzy hair): during the blow-dry, pump one drop of serum in front of the client and apply it to the roughest ends. Show them how easily the comb glides through without snagging. A result they can see with their own eyes is the most effective sales technique.
    • Maximum heat protection (heat protectant): tell the client, “Your hair was just rebonded or coloured, so it is very sensitive. This LB-II serum acts like heat-resistant clothing. If you use an iron or hair dryer at home, it protects the hair from severe damage and breakage.”
    • Premium texture (non-greasy): let the client touch their hair after application. It is not sticky at all and does not make the hair flat. The ionic technology absorbs quickly without leaving an oily residue on the stylist’s or client’s hands.

    Why client education starts at your chair

    Client education starts from your salon chair. Send clients home with professional-grade products so the results of your work last, while doubling the salon’s profit. To restock or compare more professional repair products, WhatsApp us for advice or view the product page.

  • Why Neutralizer (Step2) Must Be Rinsed Out Completely After Rebonding

    Why Neutralizer (Step2) Must Be Rinsed Out Completely After Rebonding

    If Neutralizer (Step2) is not rinsed out completely, the leftover chemicals keep attacking the hair, causing it to lose elasticity, turn dry and eventually break. After rebonding, Step2 is what rebuilds the disulfide bonds (S-S) and stops the chemical reaction, so how well you rinse decides whether the hair survives.

    Why an incomplete rinse causes damage

    Chemical straightening works by breaking and then rebuilding the disulfide bonds (S-S) inside the hair:

    • Straightener Cream (Step1): contains high-alkaline ingredients (e.g. sodium hidroksida) that break the disulfide bonds and soften the hair.
    • Neutralizer (Step2): contains an oxidising agent (e.g. hidrogen peroksida) that rebuilds the disulfide bonds and stops the chemical reaction.

    When Step2 is not rinsed out fully, the leftover oxidising agent keeps oxidising the keratin, so the hair loses its elasticity. The alkaline residue also keeps damaging the hair protein, leaving it weak and easy to break.

    How the hair structure breaks down

    Hair strength depends on disulfide bonds and hydrogen bonds: disulfide bonds determine elasticity and shape, while hydrogen bonds affect smoothness (they can be temporarily changed by water or heat). Without a proper rinse, the chain of damage is:

    • Disulfide bonds are not re-formed, so the internal structure loosens.
    • Leftover chemicals destroy keratin, the cuticle opens up and the cortex is exposed.
    • The hair loses its protective layer, becomes brittle and dry, and the risk of breakage is high.

    Clinical signs to watch for

    • Hair feels like cotton and snaps when pulled.
    • Split, dry ends because the cuticle cannot close.
    • Loss of shine from damaged keratin structure.

    How to prevent it

    • Rinse for 5 minutes with warm water until there is no slippery feel left.
    • Check the scalp pH: it should be around 5.5 (mildly acidic) after rinsing.
    • After-care: use a hair mask based on keratin or amino acids.

    Summary

    Neutralizer not rinsed out = the chemical reaction keeps going → severe hair damage → breakage. Straightening is always a process of damage and rebuilding, and the neutralizer decides how healthy the hair ends up. Rinsing Step2 well is the key to stopping the reaction, but the application technique for Step1 and the use of the flat iron matter just as much. To learn the full process, WhatsApp us for advice or view the matching rebonding products on our product page.

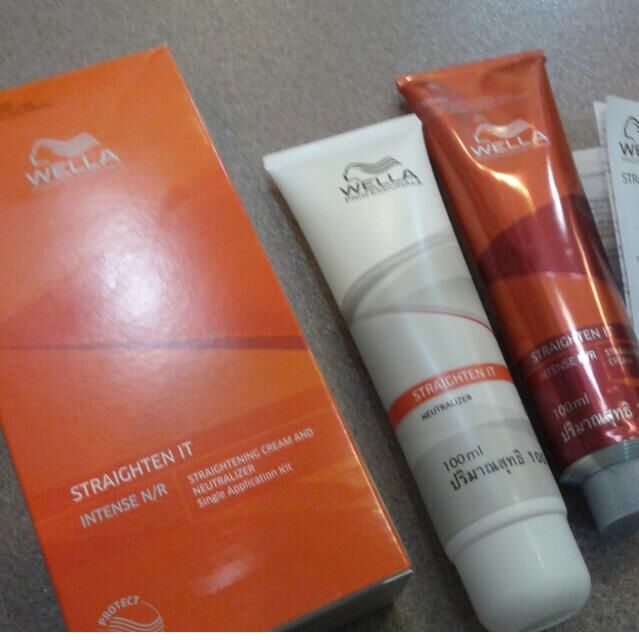
  • Wella Straight It vs Labbell: Expert Straightening Guide

    Wella Straight It vs Labbell: Expert Straightening Guide

    Choosing the right straightening cream is key to salon-level straight hair at home: Wella Straight It (formerly Wellastrate) and Labbell Super Straight are both professional creams used in leading salons. Both include conditioning ingredients such as Jojoba oil to reduce damage while straightening, leaving hair cleaner, lighter and shinier.

    1. Wella vs Labbell Straightening Creams

    A. Wella Straight Intense (Strong)

    • Size: Step 1 (100ml) + Neutralizer Step 2 (100ml).
    • Suited to: very curly, thick, coarse hair, or a first straightening treatment (rebonding / rebonding iron).
    • Result: maximum straightness that lasts, around 2-3 months depending on care.

    B. Wella Straight Mild (Moderate / Gentler)

    • Size: Step 1 (100ml) + Neutralizer Step 2 (100ml).
    • Suited to: fine, thin, coloured, damaged hair, or hair that has had rebonding before.
    • Result: a natural straight look without putting excessive chemical stress on the hair.

    C. Labbell Super Straight (Strong & Professional)

    • Size: Step 1 (500ml) + Neutralizer Step 2 (500ml).
    • Suited to: professional salon use, or very thick and stubborn hair; also suitable for frequent use.
    • Result: maximum straightness, weight and shine, like a premium salon treatment.

    2. Key Formulation Features

    • Hydro Safe Complex: improves the hair’s ability to retain moisture from within, preventing dryness after straightening.
    • Cationic Formula: keeps the hair structure balanced so it does not break during chemical application.
    • Jojoba Oil Extract (Wella): gives extra protection so the hair does not look dead or stiff.

    3. How to Use the Straightening Cream (Step-by-Step)

    You can straighten with a comb alone for a natural result, or use a hot flat iron for a fully straight rebonding effect.

    1. Step 1 (Straightening Cream)
      • Wash your hair with shampoo (no conditioner) and towel-dry until damp.
      • Apply Step 1 evenly along the hair, keeping 5mm to 1cm away from the scalp to avoid irritation.
      • Comb straight with a wide-tooth comb.
      • Leave for 15-25 minutes (without any heat or steam).
      • Rinse clean with water and dry the hair 100%. (You can flat-iron at this stage for a rebonding effect.)
    2. Step 2 (Neutralizing Emulsion)
      • Apply Step 2 onto the dried, straightened hair.
      • Comb straight and keep the hair straight; leave for 10 minutes.
      • Wash with shampoo, rinse clean, and style as you like.

    Expert Note

    A good straightening cream is only half the success. The other half depends on your application technique and flat-iron temperature control. The review is by Wong Chin Fong, a professional hair care expert. After choosing between Wella and Labbell, refer to a complete DIY rebonding guide so your straight result stays as nice as a salon’s.

    Summary

    For a first treatment on thick, coarse hair, choose Wella Straight Intense; for fine or coloured hair, choose Wella Straight Mild; for professional salon use or stubborn coarse hair, choose Labbell Super Straight. To see the products and sets, check the product page or message us on WhatsApp.

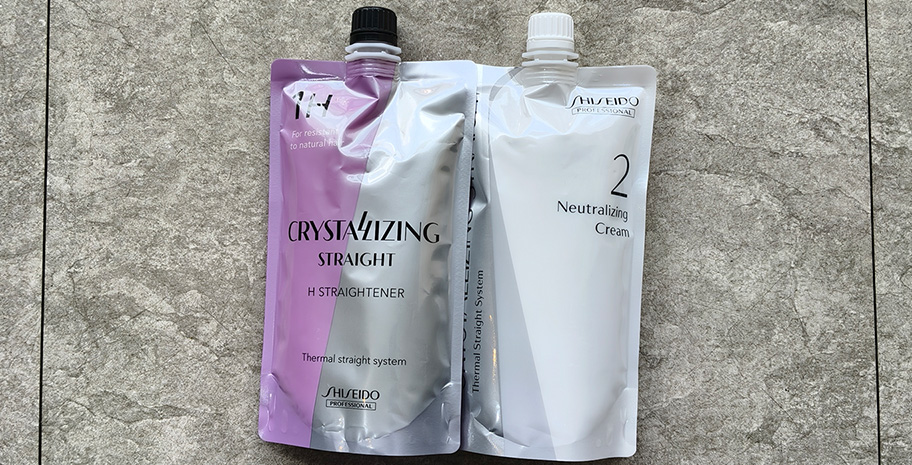
  • Shiseido Crystallizing Straight Guide: H1 & H2 Steps

    Shiseido Crystallizing Straight Guide: H1 & H2 Steps

    Shiseido Crystallizing Straight is a two-step permanent straightening system: Step 1 softens the hair with H1 Hair Softener, and Step 2 locks the shape with H2 Neutralizer. It is made for naturally curly, coarse or hard-to-manage hair that has never been coloured, and it works with a hot flat iron to give long-lasting straight results.

    What Is Shiseido Crystallizing Straight?

    It is a two-step permanent straightening system. The chemical softener changes the keratin structure inside the hair, and the heat from a flat iron sets the new straight shape.

    Best for: naturally curly, coarse or resistant hair that has never been coloured. The salon-size set is 400g and includes H1 softener and Neutralizer Cream.

    Step 1: How to Use H1 Hair Softener

    1. Apply evenly: start from the mid-lengths to the ends, keeping 1-2 cm away from the roots so the cream does not touch the scalp.
    2. Processing time: leave for 10-20 minutes; very coarse hair can go up to 25 minutes. Then do the stretch test — pull one strand; if it slowly returns to its original length, the hair is soft enough.
    3. Rinse and straighten: rinse thoroughly with lukewarm water, dry the hair completely, then set it with a flat iron at 180°C.

    Step 2: How to Use H2 Neutralizer

    1. Full coverage: make sure the neutralizer covers the hair from roots to ends to lock in the straight result.
    2. Comb and wait: spread it with a wide-tooth comb and leave it on for 20-30 minutes.
    3. Rinse thoroughly: rinse it all out. Neutralizer left in the hair can weaken the hair structure.

    Safety & Aftercare

    • Avoid the scalp: H1 contains strong alkalis and can cause irritation, so keep it off the scalp.
    • Daily care: use an ionic nutritive shampoo to keep the cuticles closed.
    • Weekly mask: use a protein hair mask 1-2 times a week to nourish the hair.

    Who Should Use It?

    It suits healthy, uncoloured hair that is naturally curly, coarse or hard to style. Do not use it if your hair is bleached, badly damaged, or if your scalp has cuts, eczema or allergies. First-time users should check with a professional stylist.

    FAQ

    How long does the whole process take? Step 1 takes about 10-25 minutes plus rinsing and ironing; Step 2 needs another 20-30 minutes. The exact time depends on your hair type.

    Why does the stretch test matter? It tells you whether the softening is complete, so the hair does not turn gummy or over-processed.

    Summary: the key to Shiseido Crystallizing Straight is the Step 1 softening time and a thorough Step 2 neutralising rinse. To get the set, check the product page or message us on WhatsApp for advice on your hair type.

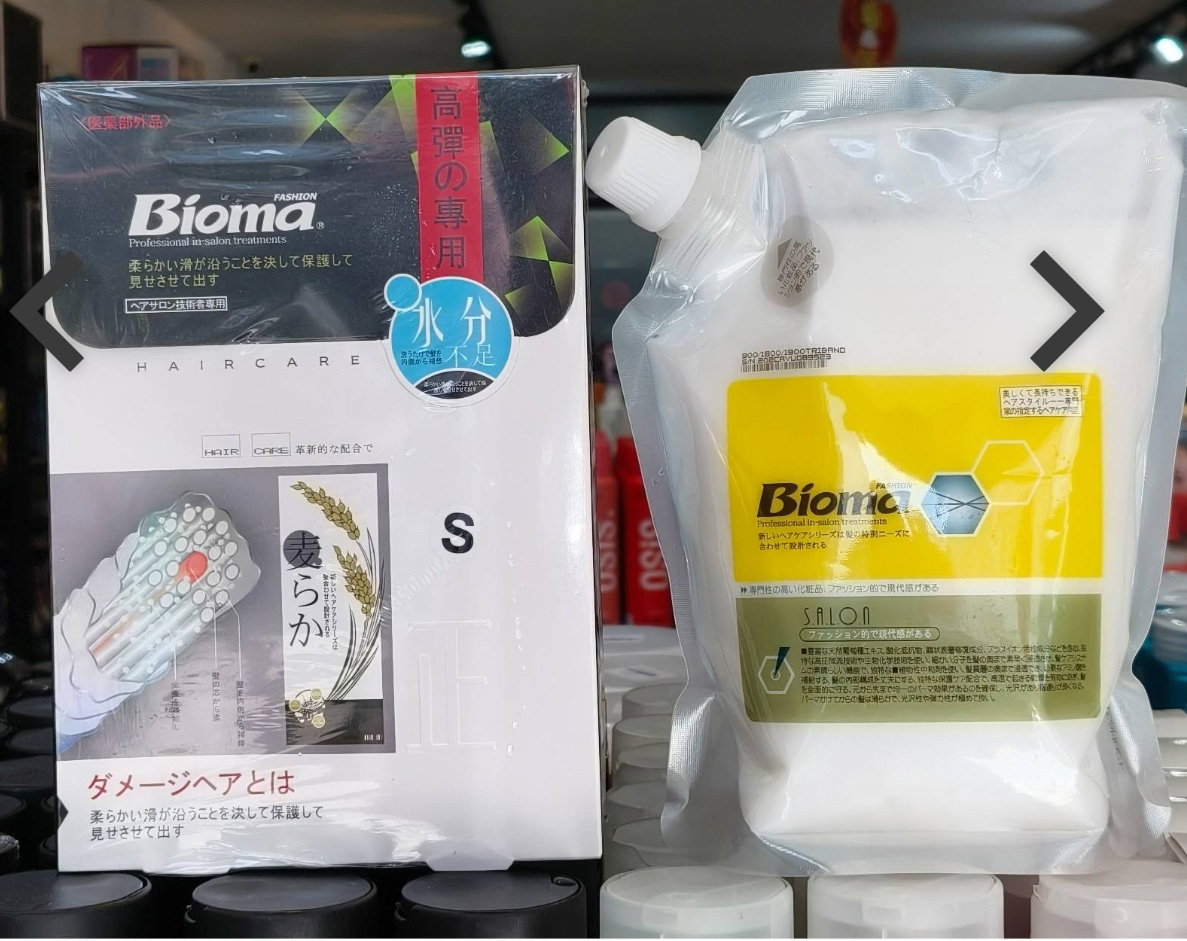
  • Bioma Oat Rebonding: 90% Repair, 10% Straightening

    Bioma Oat Rebonding: 90% Repair, 10% Straightening

    Bioma Oat Rebonding is a Japanese-formulated acid protein rebonding treatment that claims 90% repair and only 10% gentle straightening. Instead of forcing hair straight with a high-alkali cream, it repairs the hair while it straightens, so hair comes out immediately silky and shiny rather than dry and brittle.

    Core technology: acid protein straightening, not strong alkaline chemicals

    The Bioma difference is its Acid Protein formula. Traditional rebonding creams depend on strong alkaline chemicals that force the cuticle open and change the hair’s internal structure, which always causes serious protein loss. Bioma’s acid protein actively fills the empty spaces in the damaged cuticle and rebuilds the hair’s core.

    • 90% treatment + 10% straightening: it no longer straightens by damaging the hair, but repairs while letting the hair “drink” enough moisture to become straight.
    • The natural power of oat: the oat extract in the formula is the most effective anti-frizz weapon, able to reduce frizz by up to 90% even in Malaysia’s hot and humid weather.

    Bioma vs traditional rebonding cream: what is the difference?

    The biggest difference is pH: Bioma is weakly acidic and very gentle, while traditional rebonding is highly alkaline, strong and harsh.

    • Core principle: Bioma is 90% treatment + 10% straightening; traditional rebonding is 100% chemicals.
    • pH level: Bioma is weakly acidic (very gentle); traditional rebonding is highly alkaline (strong and harsh).
    • Effect on hair: Bioma is 0% damage; traditional rebonding loses protein and leaves hair brittle.
    • Durability: Bioma lasts 24 to 36 weeks; traditional rebonding lasts around 3 to 6 months.

    How long does Bioma Oat Rebonding last?

    The straightening effect of Bioma Oat Rebonding holds for 24 to 36 weeks. That is slightly shorter than the 3 to 6 months of traditional rebonding, but what you get in return is 0% damage and an intact hair structure.

    Gentle technology still needs the right technique

    Even though Bioma is gentle and preserves the hair structure, a rebonding process still needs the correct sequence of steps: from washing and applying the cream, through stretching, all the way to the neutralising stage. Salons should get the full step-by-step method right before mixing anything, so a good product is not wasted.

    Who is Bioma Oat Rebonding for?

    It suits clients whose hair is already dry, split, coarse or breaking, but who still want straight hair. Salon stylists can also use it as a gentler alternative to traditional high-alkali rebonding for customers who worry about hair damage.

    Summary: Bioma Oat Rebonding delivers a Japanese acid protein approach of 90% repair and 10% gentle straightening, making it an option for anyone who wants straight hair without wrecking it. To find out which set suits your salon, or to view the product page, just message us on WhatsApp.

  • Rebonding Hair Straight: 3 Tips Every Hairstylist Needs

    Rebonding Hair Straight: 3 Tips Every Hairstylist Needs

    Short answer: When a client’s hair reverts after a few washes at home, it is usually not weak technique but the “stubborn nature” of curly hair that was ignored — the natural cuticle scales are uneven, the cortex holds a lot of keratin, forcing it straight breaks the hair, and skipping the shape-locking step makes it spring back fast. Master the three stages of softening, temperature and shape locking and the straight result can hold for 3-6 months.

    Stage 1: Softening is not about forcing it hard — follow the hair type

    Softening is the foundation. It is better to go shorter in time than to over-soften, and better to soften lightly than too strongly. Different hair types need different strengths:

    • Thick, coarse curly hair: use a medium-strength softener (contains 15% ammonia), section the hair first (each section 2cm wide), start applying from the mid-length and leave 1cm at the ends (the ends are already damaged), then wait 8-10 minutes. Test one strand every 2 minutes — if it stretches to 1.5 times its original length and does not spring back when released, rinse immediately.
    • Fine, soft curly hair: use a low-strength softener (contains 8% ammonia), apply a thin layer over the whole head and wait 5-6 minutes. The test standard is the same; do not wait longer or the hair turns into “cotton candy” and breaks easily after straightening.
    • Damaged curly hair (coloured or bleached): apply a layer of hair care oil as a base first, then use an ammonia-free softener and wait 3-4 minutes. Rinse once the test strand stretches to 1 time its size, then lower the straightening temperature by 10℃.

    Stage 2: Temperature and tension during straightening decide whether it reverts

    Good softening does not guarantee a successful straightening. If the flat iron temperature and tension are wrong, all the earlier work is wasted.

    • Temperature choice: thick, coarse hair 180-190℃, fine soft hair 150-160℃, damaged hair 140-150℃. Remember “lower is better than higher” — high heat only cracks the cuticle and makes the hair revert more easily.
    • Tension technique: the flat iron must move in the direction of the cuticle (from root to tip, following the hair growth direction), and each section is ironed 2-3 times: the first pass is light (setting the shape), the second pass uses medium pressure (straightening), the third pass is light (locking in the smoothness). Do not iron back and forth repeatedly, or the hair overheats and gets damaged.
    • Root handling: start ironing 1cm away from the root to avoid burning the scalp with high heat. Lift the hair at about a 30℃ angle so the root keeps a little volume; do not press it flat against the scalp, or the client will feel it is “flat, stiff and unnatural”.

    Stage 3: Shape locking and aftercare hold the straightness

    Many people rinse and dry the hair and call it done — that step is the trigger for reversion. After curly hair is straightened the cuticles are still open, so you must do “shape locking + rehydration”:

    • After rinsing: use an acidic colour-locking conditioner (pH 4.5-5.5), apply through the hair and leave for 5 minutes to neutralise the alkalinity of the softener and close the cuticles — this step can make the straightening effect last more than 1 month longer.
    • Drying technique: use medium-low heat and dry from the mid-length to the ends in order. When the hair is 80% dry, comb it with a wide-tooth comb, then use cold air to set the shape for 30 seconds to improve smoothness.
    • Aftercare instructions for the client: always teach the client how to care for it at home — no washing, tying or heat ironing for 48 hours; wash with silicone-free shampoo plus conditioner; use a hair mask once a week for deep care; and dry the hair in the direction of the cuticles, never against them.

    Mistakes to avoid: do not make these 3 mistakes

    1. Do not straighten too thick a section at once: each section should not be wider than 2cm, or the middle layer gets no tension and the straightening is uneven.
    2. Do not iron straight after softening without rinsing: leftover softener corrodes the hair, so it breaks easily and reverts quickly.
    3. Do not ignore the ends: if the ends are badly damaged, trim 1-2cm after straightening to stop frizz from spoiling the overall result.

    FAQ

    Q: How long can rebonded hair stay straight?
    Answer: With correct technique (softening according to hair type, accurate temperature, proper aftercare), the hair can stay straight for up to 3-6 months. After that, new growth curls back naturally.

    Q: Can damaged hair be rebonded?
    Answer: Yes, but be more careful. Use an ammonia-free softener, apply a protective oil first, shorten the softening time and lower the flat iron temperature by 10℃ from usual.

    Q: What if the client’s hair is still curly after rebonding?
    Answer: It is usually uneven softening or a flat iron temperature that is too low. For mild cases, re-iron the parts that are not straight. For severe cases, wait 2-4 weeks before rebonding again to avoid damaging the hair.

    Q: Can the client wash the hair right after rebonding?
    Answer: No. The client must wait at least 48 hours (2 days) before washing. During this time, also avoid tying the hair or using heat tools.

    The essence of straightening curly hair is working with its natural nature, not forcing it down. Get the three stages of softening, temperature and shape locking right, and clients will stop complaining that it reverted — they will recommend you to their friends. To upgrade your rebonding skills or ask about professional salon products, WhatsApp Shine Hair Zone for a consultation.

  • Shiseido Crystallizing Straight for Thick, Resistant Hair

    Shiseido Crystallizing Straight for Thick, Resistant Hair

    Shiseido Crystallizing Straight is a two-step permanent straightening system built for thick, resistant and uncoloured hair. It reorganises the keratin structure inside the hair with a chemical softener, sets the new shape with a high-heat flat iron, then locks it with a neutraliser. One session can last 3 to 6 months — but one wrong step can snap the hair or burn the scalp.

    What Is Shiseido Crystallizing Straight?

    Shiseido Crystallizing Straight is a two-step permanent straightening system developed by Shiseido, designed for thick, resistant hair that has not been bleached or coloured.

    Unlike an ordinary “straightening cream”, it does not just coat the surface. It uses a chemical softener to reorganise the keratin structure inside the hair strand, sets the shape with a hot flat iron, and finally uses a neutraliser to lock the new straight form in place.

    How It Works

    • H1 Softener (straightening cream): Contains alkaline ingredients that open the cuticle and soften the inner structure so the hair becomes workable.
    • 2 Neutraliser (setting cream): Applied after flat-ironing. It helps the keratin reconnect and locks the new straight structure. This is the most overlooked step in the whole process, yet the most important.

    Step 1: H1 Softener — The Most Critical Step

    1. Section and apply: Divide the hair into 4-6 sections. Keep 1-2 cm away from the scalp and apply evenly from that point to the ends. The gap protects the scalp and prevents softener build-up that leads to breakage.
    2. Wait for softening: Leave it at room temperature for 10-20 minutes. Thick hair can go up to 25 minutes, but you must check every 5 minutes. Correct softening test: pull one strand gently — it should stretch and bounce back to about 1.5 times its original length. Do not leave it longer than needed.
    3. Rinse thoroughly: Rinse with warm water (never hot) for more than 5 minutes until there is no residue left. Use your fingertips to gently clean around the roots.
    4. Blow-dry and flat-iron: Dry the hair completely, then use a professional flat iron at 180°C / 356°F. Take small sections (no thicker than 1 cm), glide from root to tip at a steady speed, and hold 2-3 seconds per section.

    Step 2: 2 Neutraliser — Where Success Is Decided

    1. Full coverage: As soon as flat-ironing is done, apply the H2 neutraliser from root to tip over the whole head. Make sure every strand is coated, especially the areas that were flat-ironed.
    2. Comb and wait: Comb gently once or twice with a wide-tooth comb to help absorption. Leave for 20-30 minutes. Never exceed the time, but never shorten it either.
    3. Final rinse: Rinse thoroughly with warm water until completely residue-free. Any residue will keep softening the hair and eventually cause breakage.

    Shiseido Crystallizing Straight vs Ordinary Straightening Creams

    PointShiseido Crystallizing StraightOrdinary straightening cream
    Target hair typeThick, resistant, healthyFine or medium hair
    Softening systemCrystalline keratin restructuring technology, more controllableTraditional strong alkali, hard to control
    Durability3-6 months2-4 months
    Operating riskNeeds professional judgement of the softening stageEasy to over-soften and break the hair
    Guidance includedClear steps, suitable as a professional referenceMost give no detailed temperature or timing guide

    3 Red Lines You Must Never Cross

    • ❌ Scalp contact: H1 softener contains strong alkaline ingredients. Direct contact can cause chemical burns, redness and even hair loss. Always keep a 1-2 cm safety gap.
    • ❌ Too much heat: A flat iron above 180°C will damage hair that has already been softened and cause irreversible protein damage.
    • ❌ Incomplete neutralising: Neutraliser that is not rinsed out properly is the number one reason hair keeps getting softer and breaks after a straightening session. Rinse longer rather than shorter.

    Who Is It For — And Who Must Avoid It?

    • ✅ Suitable: Naturally curly, thick or resistant hair that has not been bleached or coloured and is in good condition.
    • ⛔ Avoid: Bleached or coloured hair, severely damaged hair, hair that feels spongy or is extremely porous; a scalp with wounds, eczema or allergies; pregnant and breastfeeding women (consult a doctor first).

    Aftercare Decides How Long It Lasts

    • Shampoo choice: Use a mildly acidic shampoo such as LB-II Ionic Shampoo to stop the cuticle opening too early and to protect the straight result.
    • Regular hair masks: A deep repair mask 1-2 times a week to top up keratin or amino acids and prevent dry, split ends.
    • Do not colour immediately: Wait at least 2 weeks after straightening before colouring, so the keratin has time to stabilise.

    My Advice: For the First Time, Let a Professional Do It

    Shiseido Crystallizing Straight is an excellent product, but its difficulty and risk level are not beginner-friendly for home use. Judging the softening stage and controlling the flat iron temperature are skills that no manual can fully teach.

    If you are unsure about your own hair condition, or your scalp is sensitive, have a professional hairstylist handle it the first time. Once you have seen the correct process with your own eyes, you can decide whether to try it yourself later.

    Bottom line: with Shiseido Crystallizing Straight, discipline with timing, temperature and rinsing matters more than the brand itself. If you are unsure whether your hair type is suitable, message us on WhatsApp, or see the full details on the Shiseido Crystallizing Straight product page.

Hair Problem?WhatsApp me