You’ve probably seen those TikTok videos: “Do your own hair rebonding at home and save hundreds!” But after trying it yourself, your hair ends up dry, frizzy, or even snapping off—and worst of all, it’s not even straight. Why? Because most tutorials skip the two most critical steps: how to control damage and how to tell if the softening process is actually done.
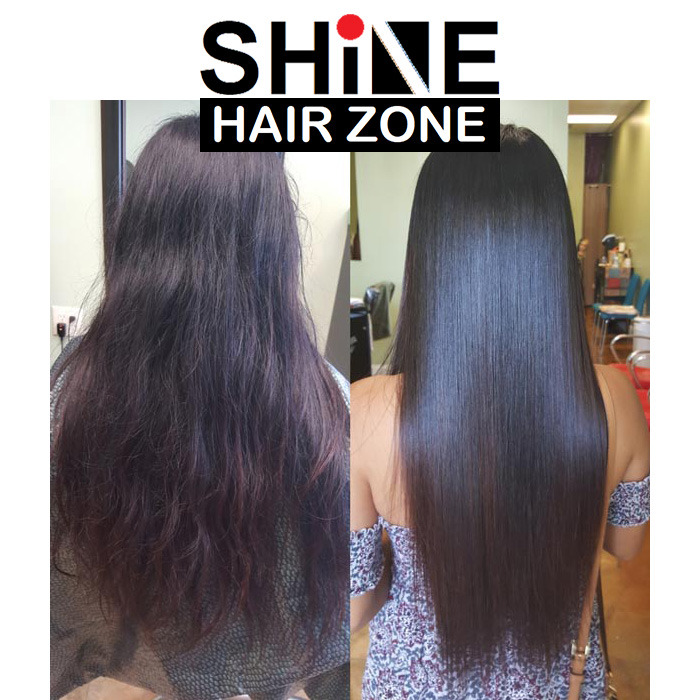
Today, I’m breaking down these professional secrets for you. This isn’t just a “apply and wait” tutorial; it’s a full salon-grade guide to achieving smooth, healthy, and long-lasting straight hair at home.
Why Does DIY Rebonding Usually Fail?
Before you start, understand the three most common mistakes:
- Using the wrong strength: Thick, coarse hair needs a stronger rebonding cream. Using a weak formula leads to repeated applications, which eventually destroys your hair texture.
- Skipping the Softening Test: This is the most crucial step. Not enough time? Hair won’t straighten. Too much time? Your hair turns into “over-processed” mush that breaks instantly.
- Poor Temperature Control: Using a flat iron that is too hot on chemically softened hair will literally “cook” and burn your strands.
3 Essentials You Must Prepare
This isn’t just a shopping list; it’s your toolkit for success.
1. Choose the Right Rebonding Cream
In the salon, we never gamble with products. I personally recommend Labbell Vitalist Rebonding Cream. It is specifically formulated for stubborn Asian hair and offers an Extra Strong variant.
Labbell uses an AHA Fruit Acid System to protect the hair during the process. One 1000ml bottle can last for 5 to 8 sessions, offering much better value than small retail packs.
2. Digital Temperature-Controlled Flat Iron
You need a professional flat iron that can be set precisely to 180°C. Look for ceramic or titanium plates for even heat distribution.
3. Gloves & Non-Metallic Tools
Rebonding creams contain Thioglycolate. Always wear rubber gloves and use a plastic or ceramic bowl. Metal tools can react with the chemicals and ruin the results.
Step-by-Step Professional Rebonding Process
Step 1: Wash & Towel Dry (100% Damp)
Wash hair with a deep cleansing shampoo. Towel dry until it is 100% damp—not dripping, but not dry. Too wet dilutes the cream; too dry causes uneven absorption.
Step 2: Apply Cream No. 1 (Softening)
Section your hair into four parts. Apply Cream No. 1 starting 1cm away from the scalp down to the ends.
- Chemically Treated Hair (Colored/Permed): Leave for 15-20 mins (No heat).
- Virgin Hair (Coarse/Naturally Curly): Leave for 20 mins, then apply a fresh layer and wait another 10 mins.
The Softening Test: Take a single strand of hair and pull gently. If it stretches to 1.5 – 2 times its original length and bounces back slowly, the softening is complete.
Step 3: Rinse & Dry
Rinse with lukewarm water for 5 full minutes. Do NOT use shampoo. Towel dry until damp.
Step 4: Flat Ironing
Preheat your iron to 180°C. Take thin sections and glide the iron 4 to 5 times from root to tip at a steady pace. This “locks” the straight memory into the hair.
Step 5: Apply Cream No. 2 (Neutralizer)
Never skip this! Apply Cream No. 2 evenly and leave for 20 minutes. This re-bonds the internal structure of your hair. Without this, your hair will be extremely fragile and break within days.
Step 6: Final Rinse
Rinse thoroughly with lukewarm water. Apply a leave-in conditioner or heat protectant for extra shine.
Post-Rebonding Care: The Golden Rules
- Do not wash your hair for 48 hours: Allow the chemical bonds to stabilize.
- Do not tuck hair behind ears: This will create permanent kinks.
- Avoid hair ties: Let your hair hang naturally to maintain the straight shape.
🎁 Monthly Promotion: Free Repair Serum with Rebonding Kits!
This month, spend RM70 or more on Labbell Rebonding Cream or any product, and get a FREE Labbell Crystal Repair Serum (Worth RM18.60)!
Perfect for post-rebonding care to lock in moisture and prevent frizz all day long.
I hope this guide helps you achieve the perfect straight hair safely at home. If you have any questions during the process, feel free to WhatsApp me for a free consultation. Good luck!
📦 Salon Group Buy (Join Order): Secure Factory Prices, Save Your Cash Flow!
If you order in small batches for a single salon, you’ll definitely be paying premium prices. Why not combine our orders? You get the rock-bottom wholesale price instantly! Shine Hair Zone compiles orders for everyone—just tell us what you need, and we’ll hit the volume quota to fight for the lowest factory prices. Say goodbye to stuck cash flow! Hot items for our group buy include:
- 🛡️ Salon-Exclusive Brands (Not sold on Shopee/Lazada. Customers can’t compare prices online, so you protect 100% of your profit margin!)
- 🧴 Rebonding / Straightening Creams (Take by the carton for the best wholesale price).
- 🌙 JAKIM-Certified Halal Brands (Muslim customers can use them with zero doubts, instantly boosting your salon’s credibility!)
- 🏷️ Major Salon Brands (L’Oréal, Schwarzkopf, Shiseido, and other salon-sized professional lines).
* Note: Group buy prices are strictly nett. This excludes postage, packing, and a small runner/admin fee (we do transparent business here, strictly no hidden charges).
In today’s economy, protecting your cash flow is everything. Stop forcing yourself to hoard boxes of dead stock that just collect dust. Just list down what you need, and I’ll help you secure the best price for everyone!
📲 Click to WhatsApp & Join The Group Buy Now!